Chicken Kiev – Crispy Chicken with Garlic Herb Butter
Ingredients:
Preparation mode:
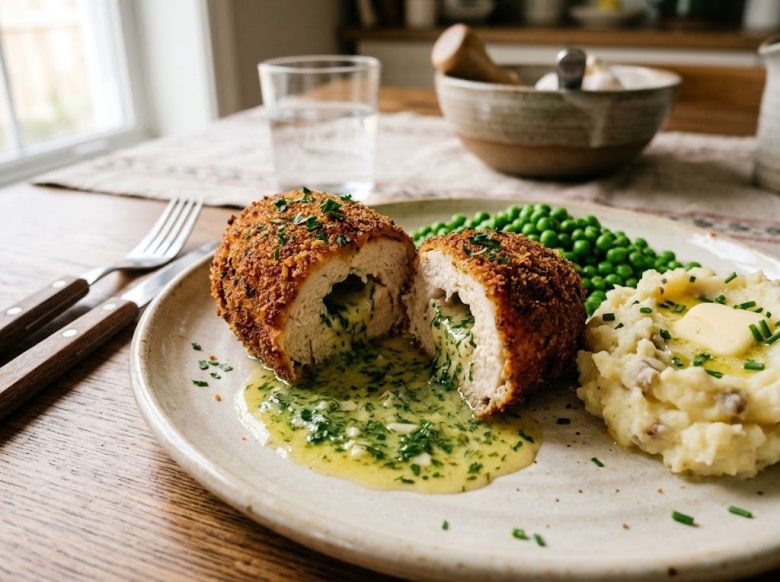
👉 Chicken Kiev (often spelled Chicken Kyiv) is a crispy breaded chicken breast hiding a core of cold herb butter that bursts out when you cut into it. The idea came from French cooking in the Russian Empire, where it was known as “côtelette de volaille”, and the name Kiev cutlet appears in Russian cookbooks around 1915. It became famous as the signature dish of Kyiv’s grand Continental Hotel and is still one of the most loved dishes in Ukraine and far beyond.
How to Make Chicken Kiev
- Make the herb butter. Mix the soft butter with the garlic, dill, parsley, lemon zest and a pinch of salt. Shape into a log about 2 cm thick on baking paper, roll up tightly and freeze for 30 minutes, until very firm. Cut into 4 pieces.
- Prepare the chicken. Place each breast between two sheets of cling film and pound gently with a rolling pin or meat mallet to an even thickness of about 5 mm, without making holes. Season with salt and pepper.
- Wrap the butter. Put a piece of frozen butter at one end of each breast. Fold in the sides and roll up tightly, completely enclosing the butter. Wrap each roll firmly in cling film and chill for 30 minutes so it holds its shape.
- Coat twice. Set out three plates with flour, beaten egg and breadcrumbs. Roll each piece in flour, then egg, then breadcrumbs. Dip again in egg and breadcrumbs for a second coat – this double layer keeps the butter inside.
- Fry. Heat 3–4 cm of oil in a deep pan to 170°C (340°F). Fry 2 pieces at a time for 3–4 minutes, turning, until deep golden all over.
- Finish in the oven. Transfer to a rack on a baking tray and bake at 190°C (375°F) for 12–15 minutes, until the chicken is cooked through (74°C / 165°F in the centre).
- Rest and serve. Rest for 3–4 minutes, then serve with mashed potatoes, buttered peas or a fresh salad. Warn your guests – the butter is hot!
Tips for the Best Chicken Kiev
- Freeze the butter well – soft butter melts and leaks out before the chicken is cooked.
- Seal the ends carefully and use two coats of breadcrumbs.
- Do not fry too hot: the outside will burn before the inside is cooked.
FAQ
Is it Chicken Kiev or Chicken Kyiv?
Both are correct. Kyiv is the Ukrainian spelling of the city’s name and is now used by many restaurants and supermarkets.
Why does the butter leak out?
The butter was not frozen hard, the chicken had holes after pounding, or the ends were not sealed. A double coat of egg and breadcrumbs helps a lot.
Is chicken Kiev Ukrainian or Russian?
Its roots are in French cooking of the Russian Empire, but it is strongly associated with the city of Kyiv and is a classic of Ukrainian restaurants today.
👉 More Ukrainian cooking: red borscht, varenyky and syrniki.
Ask the Chef:
Missing an ingredient or cooking for a crowd? Ask anything about this Chicken Kiev recipe.
AI cooking assistant. Answers can be wrong — always check allergens yourself.
Footnotes:
Bake instead of fry: brown the coated chicken in a pan for 2 minutes per side, then bake at 200°C (400°F) for 15–20 minutes until the centre reaches 74°C (165°F).
Make ahead: shape and coat the chicken up to 24 hours ahead and keep it covered in the fridge, or freeze uncooked for up to 2 months and bake from frozen (add 10–15 minutes).